
Search our Help Guide
There are 2 different ways to upload your panoramas and associated metadata to 360Cities:
1. Via the Web
First create your 360Cities account and go to your dashboard and click on upload. Follow the detailed web publishing instructions. It will take a few minutes to process the image. In the meantime, you can go to Panoramas-Pending in the header menu to see the panoramas being processed or to Panoramas-Unpublished to see the list of panoramas that have already been processed.
Note: You need to wait until your panorama is processed before you can publish it.
2. Via FTP
You can use any FTP program (we strongly recommend Filezilla) to send your files to the 360Cities server.
Login details to your personal 360Cities FTP account can be found in your ftp settings.
Please remember: Even if you upload your files via FTP, you must follow our upload requirements.
Having problems problem with uploading your panoramas via FTP? Please try the following before contacting us:
- Username and Password. Be sure to copy the login name/password very carefully and try several times. It’s fairly common to make a mistake in entering the correct login credentials.
- Binary Transfer. Make sure you set your FTP client properly (you should use binary transfer, and not ASCII). Otherwise, uploading will not work. If you are using active mode and experience connection issues, set your FTP client to passive mode.
- Firewall Exceptions / Connection Timeouts. When the connection starts fine and then times out on directory listing, you are probably having a problem with your firewall or modem. Make sure your FTP program is in the exceptions list of your firewall (e.g. Windows firewall). Also make sure the exceptions are not made only on the private network but also on the public network - in other words, the network you are using to connect to the internet. Often your firewall will block an important port needed by the FTP client to work properly.
- Try a different computer. Try connecting from a completely different computer. If it works, you know the problem is with your machine.
- Try a different physical location. Sometimes your internet service provider blocks FTP traffic. To make sure that's not the case, please try your friend's computer or your office at work or some completely other physical location with a different internet provider.
- Double check your server name, login, and password again. You would be surprised how often people copy these details incorrectly.
To view the status of your uploaded files, check the "uploader.log" file in your FTP directory. You can see useful information about what the server has done with each file you upload. After your files are uploaded successfully, they will be deleted from the FTP directory.
You should carefully add accurate and correctly spelled metadata (preferably in English) to all panoramas you upload to 360Cities. Quality metadata in English dramatically improves your panoramas’ search ranking, making them more likely to be found by search engines and licensing customers search 360cities.net. More information about entering metadata can be found here.
Go to you published or unpublished panoramas and click Edit > Name & Description tab. The metadata you provide should answer the following questions: What is the panorama of? Where has the panorama been taken? When was the panorama taken? Who (if anyone) is in the panorama?
- Handle: If you haven’t published your panorama, you’ll be able to edit its handle. Note that handle can’t be edited after the image has been published.
- Title: Include name of the place and / or subject of the image.
- Description: Expand on information you have included in the title if possible. Long descriptions are not necessary. Remember that words used in the description will help your panorama be found. A detailed description can make the difference between whether your panorama is chosen by a licensing customer or not.
- Tags: Any words or phrases that describe or categorize the panorama and that are not included in the handle, title, and description can be added as tags.
Edit your image location, heading and viewpoint:
It is very important that you set the proper location in order to maximize the chance that your image will be found by our licensing customers.
Go to your published or unpublished panoramas and click Edit > Location tab:
-
Location: The first thing you have to do is to set a location for your panorama. There are three ways you can use to set the proper location on the map:
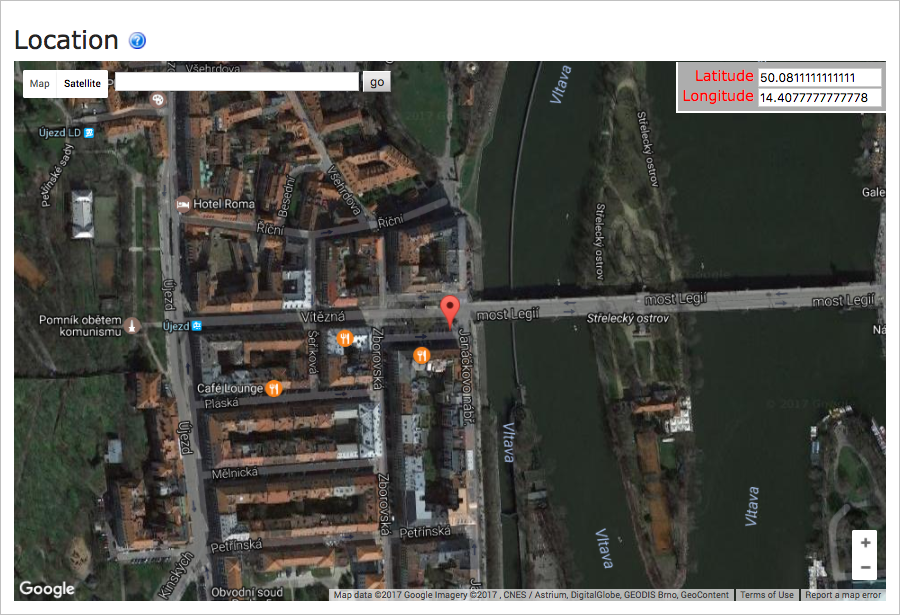
- Drag and drop the marker if it’s nearby the real location you can zoom in/out.
- Search for the place: any place that is in Google Maps can be found. Then you can zoom in and drag the marker to the proper place.
- Type the latitude and the longitude where your panorama was taken.
-
Heading: We’ll use it to set which way the north is. If you are not sure where the north is you can check your image and the location to find a signal that give you the where one of the cardinal points is.
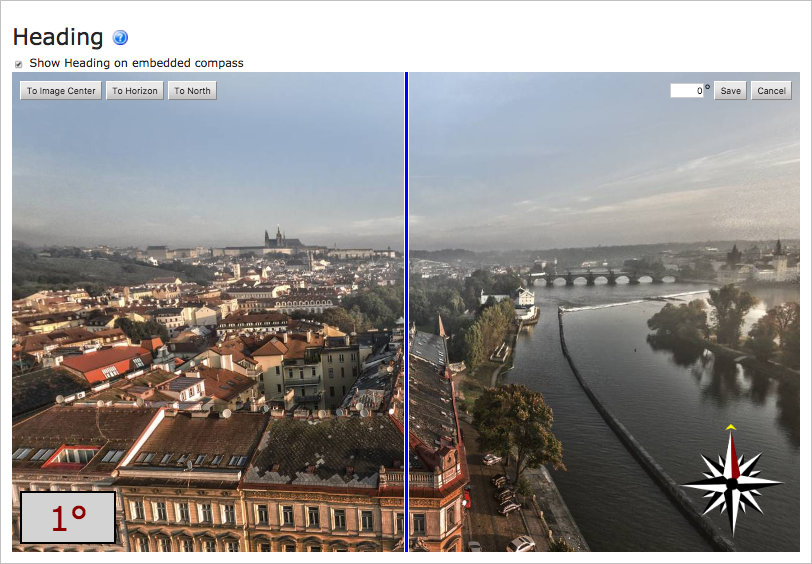 Move the panorama to that point, the blue line is the centre of the image > click edit > then go to the bottom right and move the compass to the correct point. And click save.
Use the compass feature for those panoramas which have an edited heading. A letter "N" for North will be visible on the compass on the lower left corner of the panorama. Just tick the box "Show Heading on embedded compass".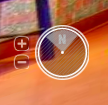
-
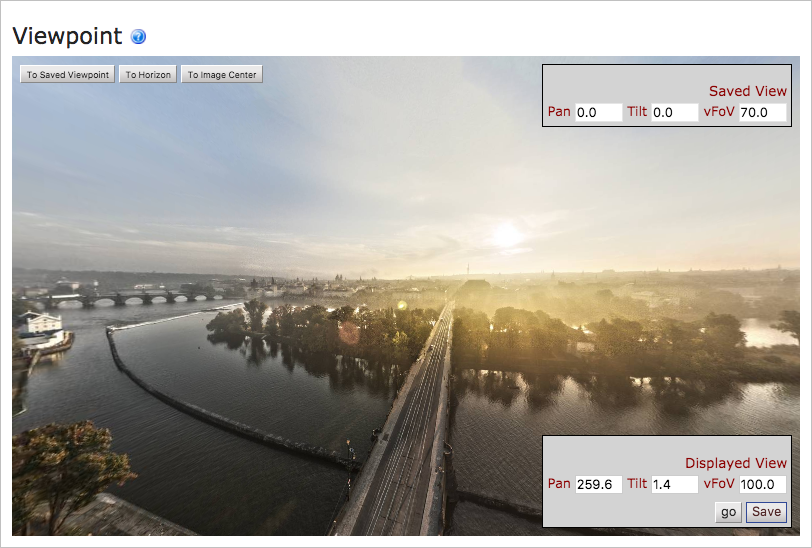
Viewpoint: It’s the first view it’s loaded when the panorama loads. Move the panorama, zoom in/out to choose your favourite view point and click save or manually enter the view point on the bottom right and click save.
The Annotation feature allows you to annotate your panoramas in order to provide details about a particular area inside the panorama. Just choose the spot where you want to set the icon on your panorama. Then, write a short text about that spot (max 200 characters).

The PRO Panorama Page URL feature allows you to share your panoramas without arrows pointing to nearby panoramas or to any other photographers’ panoramas and without thumbnails and ads. Just go to your unpublished or published panoramas and click on Edit > Other tab. There you’ll find the PRO Panorama Page url, copy it and share it.
Note this feature is only available for PRO and COMPANY accounts.


Further reading (advanced panorama shooting tutorials):
PanoTools Wiki - information hub for panoramic photography
Panorama Tutorials - more links
Read More
Read More